
GM's Tip of the Week

Hello, fellow Portalites.
Cruvis is out this week, on account of vacation; so I’m going to cover a Portal tip for GMs that I hope will be helpful to everyone. I’m going to cover using images!
The first thing you will need is a place to store images online. I actually recommend arranging for private storage, rather than using something like Imgur or Pinterest or so; it will save you trouble down the line. However, where that is not an option, there are free resources out there that will work. Read the ToU before uploading /any/ original work; some, like Imgur, take using their services as implicit permission for them to use your work for anything as long as it is uploaded on their servers. You might not want that.
Getting the image uploaded is step one. Once you have it, get a copy of the image’s URL; that’s the address the browser needs to display the image. Then, go to the Referee menu for your game, it should look something like the screenshot below. You will want the character builder, as highlighted here.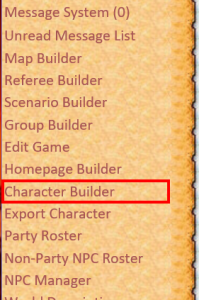
This will bring up a screen not unlike the standard character builder, with options for the PCs, and for NPCs that might not be part of the group.
Select the character you want to add an image to in the drop-down, and click ‘Modify Character’. At this point, you have a standard-issue Rondak’s Portal Character Sheet, with a bunch of extras. One of those extras is right underneath the Character Description field. 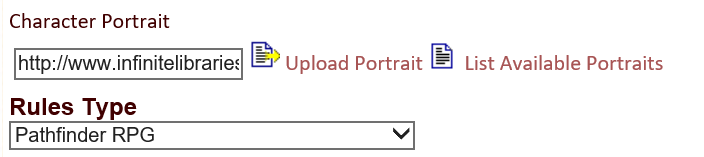 That will look like this, over here. You can see that there is a URL in the Character Portrait field; that is where you will want to put your URL.
Don’t click ‘upload’ or ‘list available’, at the moment, those buttons do nothing; just click ‘Update Character’, and provided the URL is correct, the image should show up. If it doesn’t, there is probably a misplaced character, or something in the URL; this happens to me all the time.
You can do this with maps, as well, using the Map Builder. If you do not already have a map built, you will need to refer all the way down to the bottom of the screen for the ‘Create Map’ link.
If you save a new image to the same URL as the old one, it will update automatically; you need do nothing extra, barring caching, which is a whole different kind of headache.